Laser Levels are an essential tool for any DIY enthusiast or construction professional. From small DIY jobs such as installing shelves or pictures to major construction jobs on huge sites, you want to make sure that the job you are doing is properly level.
And that’s when laser levels comes in handy.
Since your job will be wonky if you do not set up your equipment properly. The device will be of no use to you whatsoever if you are unable to read it.
And finally, instructions for use will of course vary hugely depending on the type of laser level you are using.
This article will give you a detailed breakdown of how to set up, use and read different kinds of Laser Level, from the simple DIY to tool the expensive equipment you will use on complex construction jobs.
Especially if this is a tool you are not familiar with, I hope this guide will help you use this piece of kit.

How to set up a laser level
Ensuring the laser level is straight is an absolute priority. Instructions for setup will vary depending on the type of laser level you are using.
But the general principle involves placing the device itself, or the tripod on a top a flat surface.
Most devices will have some way of letting you know that the device is level.
Either by having a bubble vial which will show that the device is level when the bubble is between two lines.
Or self-leveling laser levels will automatically adjust themselves provided they are on a somewhat level surface (either the floor or a tripod).
If you’re placing the laser level on a tripod, it’s usually best to purchase the device and tripod as a package because there will often be a mechanism, such as a screw, whereby the device can be firmly secured to the tripod, preventing accidental damage or inaccurate readings. Oh, and by the way, here’s our other page where we talk about how to choose a laser level.
If you have a manual-leveling laser, it is a good idea to frequently check the device to ensure it is calibrated throughout your job.
Now you are all set-up and ready to take readings and put the device to good use.
How to read a laser level
Once turned on, the device emits a laser which can be projected at some distance, up to several hundred meters depending on the model you are using.
The laser emitted can be a dot, a line, a cross (i.e. a parallel and perpendicular line), multiple lines or crosses, or a rotatory line that will show the level at 360 degrees vertically or horizontally.
If you’re working inside, it is a simple case of seeing where the laser is on the wall and making a pencil mark.
If you’re working outside and you find it difficult to see the laser, it may be a good idea to buy a detector.
Attaching the detector to a measuring stick, or holding it manually, you move the detector until it makes a steady beeping sound, and then you know where the laser is pointing.
Some detectors will have a visible beam or some other visual indicator to let you know when you have a perfect center.
Once you get a good reading, you can make a pencil marking and continue with your job.
SAFETY POINT:
Many detectors are very loud.
This is so you can hear them on busy construction sites over the sound of other machines and workers.
Make sure when working with these detectors you wear earmuffs or do not put them right to your ears.
How to use a rotary laser level
Rotary lasers project a constant, 360-degree beam of light around a given surface.
Of course, as I have already mentioned, a level surface is crucial for using this device, whether you are resting it on a table for small jobs or a tripod for bigger jobs.
Unlike line lasers or spot lasers, you need to make sure there are no obstructions in front, behind, or on either side of the laser.
So, setting one up in, for example, a very busy car park is a very bad idea.
The specific applications of a rotary laser depend on what you are doing with your rotary laser.
For example, if you are installing a chair railing indoors, and the room you are working in is flat, it is simply a case of detecting or seeing where the laser hits the wall and placing pencil markings down for your job later.
But you can also use them outdoors for bigger jobs.
You can also use a rotary laser outside, with the assistance of a transit level, to complete bigger jobs such as grading and the laying of foundations.
How to use a laser transit level
For big surveying jobs, such as installing foundations, you want to know the gradient of the surface you are using. For this purpose, a laser transit level is needed.
First set up your laser in the middle of your working space, again ensuring that there are no obstructions.
By leveling the laser on both aixses, a consistent rotary beam should be projected around your entire working space.
Since you will most likely be working outside if you are using a laser transit level, a measuring stick and a detector are advisable pieces of kit to be purchased alongside this device.
You can place the stick and detector at any point of your worksite and find out what the elevation is, compared to the elevation of the laser.
So for example, if the laser is positioned 5 feet above the surface level in the middle of your worksite, but 20 feet north the detector is activated at 4 feet above surface level, you know there is a 5% gradient between the north section of your site and the middle.
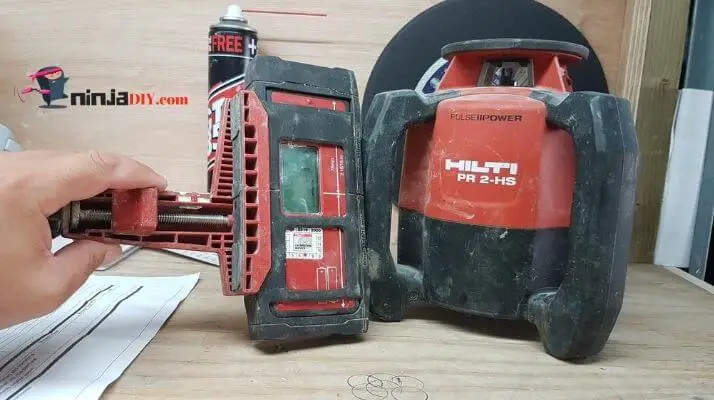
Laser transit levels need to be used with tripods, and if you are surveying very large sites, they need to be accurate over long distances.
To save time this would require one person to operate the laser and the other to operate the measuring stick.
Some laser transit levels come with telescopes to facilitate this.
How to use the line laser level
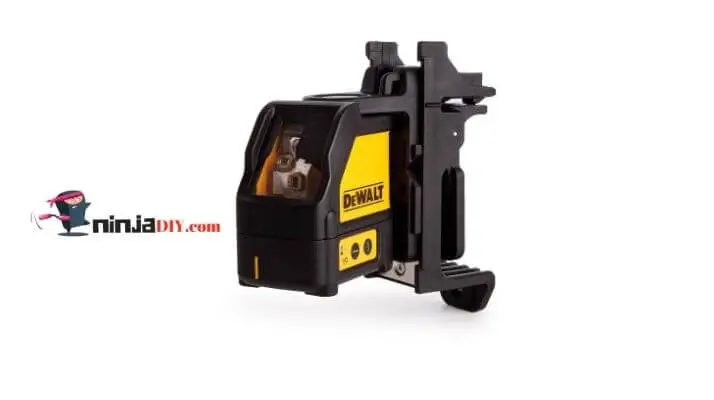
A simpler tool for indoor simple tasks is a line laser level.
This tool is perfect for installing shelves, plug sockets, and wall hangings, and ensuring that they are all level with each other.
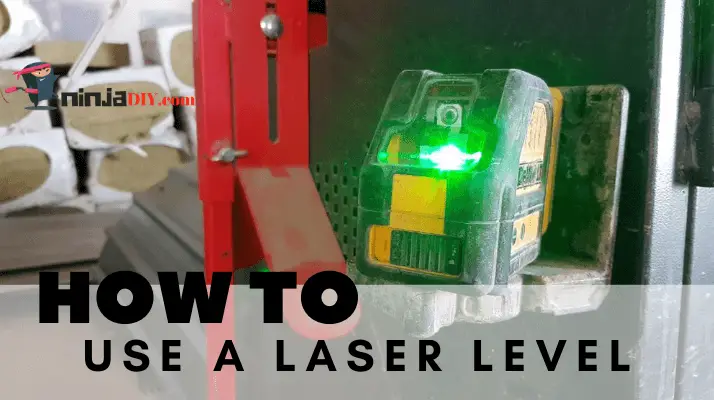
Simply place your device flat (again use the manual or self-leveling devices to ensure the device is level) and then turn it on.
It should project a horizontal line onto the wall you are pointing your device at, and some line lasers will have an option for you to project a single vertical line as well.
Once the laser line is being projected on the wall, simply make pencil markings where you intend to install your fixtures and you are good to go.
For example, if you are pointing your line laser level horizontally at a wall to install shelving brackets, place pencil markings on the laser line where you intend to place your fixtures.
Make all the pencil marks you need to make before turning the laser off, or keep it on while you are working.
SAFETY TIP: If you leave it on while working, avoid staring directly into it or wear goggles.
How to use a laser level outside
As already mentioned, working with a laser level outside presents additional challenges. If working with a tripod, you need to work to make sure the tripod is even so that the laser level is even (see below).
Additionally, you may struggle to see the laser, so it is recommended either that you purchase a green laser, which is more visible to the human eye, or that you purchase a laser detector.
There are also tinted goggles/glasses that may help you see the laser outdoors.
If none of these solutions work for you, then you may simply need to effectively manage the hours you use the laser, working earlier or later in the day when it is darker and you can see the laser with greater ease.
Finally, make sure that your worksite is contained and that you are not pointing the laser onto other people’s property or into the eyes of those passing by.
You may need a shield or a tarpaulin if your worksite is in a public area and you need to point the laser in the direction of the public.
Finally, do not forget to put your laser detector on loud if you are using it in a busy outdoor setting, where there are a lot of other workers and passing traffic.
How to use laser level with tripod
With straightness being crucial for all jobs with laser levels, it is worth investing in a tripod with adjustable legs.
Because even if the terrain you’re placing a laser level on is not even, you can make the individual legs uneven to compensate and ensure the tripod surface itself is steady.
This ensures both that you get a very accurate job and that the device, which may cost a lot of money does not fall off the tripod and break.
Tripods should generally be purchased as a package alongside laser levels.
This is because tripods will usually contain some fixing device, such as a screw mount, which will allow you to attach the device to the tripod securely. Remember to treat your laser level carefully.
How to use a cross line laser level
A cross line laser level will project a horizontal line and a vertical line. Some will project two for more complicated tasks.
This tool is perfect for jobs that require you to install square or rectangle-shaped objects, like pictures or tiling, at a perfect 90-degree angle.
If you’re placing objects on the ceiling, like ceiling downlights or even decorative tiles, place the device on the floor and point it upwards (be careful not to tread on it).
But if you’re placing objects on the floor, attach them to a ceiling beam (some such as the one in the video below) and point it downwards.
To place things on the wall you will need something like a tripod, a bucket, or a table depending on the hight you are working at.
Once you have put it down, turn it on, make sure it is level and you are ready to go.
How to use a laser level vertically
Placing your line or spot laser on the floor (again ensuring it is level) and pointing it vertically upwards has a variety of uses.
For example installing fixtures on the ceiling, or making sure plumbing is… well, plumb.
The same principles of ensuring the device is leveled before you begin to take readings and taking extra caution since your laser level may be on the floor do apply.